Pick your mode
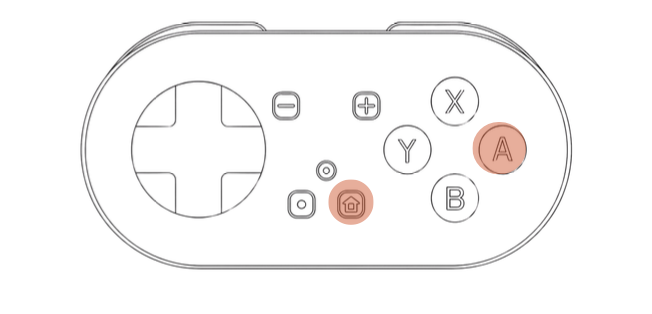
Hold A + Home for Keyboard Mode if you want the simplest desktop setup. Hold Y + Home for Switch Mode if you want to customize your keybinds.
Guide
Use this guide to set up MODI on macOS, Windows, or Linux. Desktop can use either Keyboard Mode or Switch Mode, so the main choice is whether you want the built-in layout or Switch Mode with the optional Anki plugin.
Start with Keyboard Mode if you want the quickest desktop setup. Use Switch Mode if you want to customize your keybinds.
Setup
Pick a mode, pair over Bluetooth, and then decide whether you want the built-in layout or plugin-based remapping.
Use Keyboard Mode on desktop when you want the simplest out-of-the-box layout.
Use Switch Mode on desktop if you want to customize your keybinds.
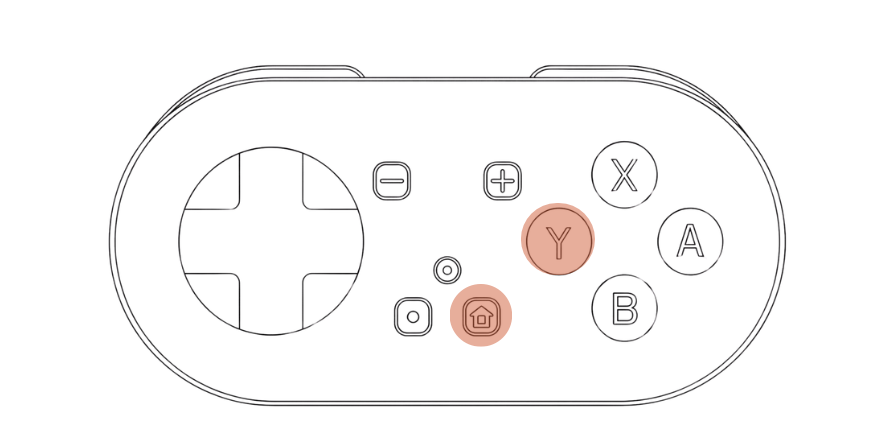
Hold A + Home for Keyboard Mode if you want the simplest desktop setup. Hold Y + Home for Switch Mode if you want to customize your keybinds.
Pair MODI over Bluetooth, then hold it vertically with the D-pad facing down so the controls line up the way the default layouts expect.
You can start reviewing right away with the built-in layout. If you want custom remapping in desktop Anki, switch to Switch Mode and install the MODI Anki plugin with code 406900239.
Modes
Both work on desktop. The difference is mostly about whether you want the simpler default path or the plugin path.
Notes