
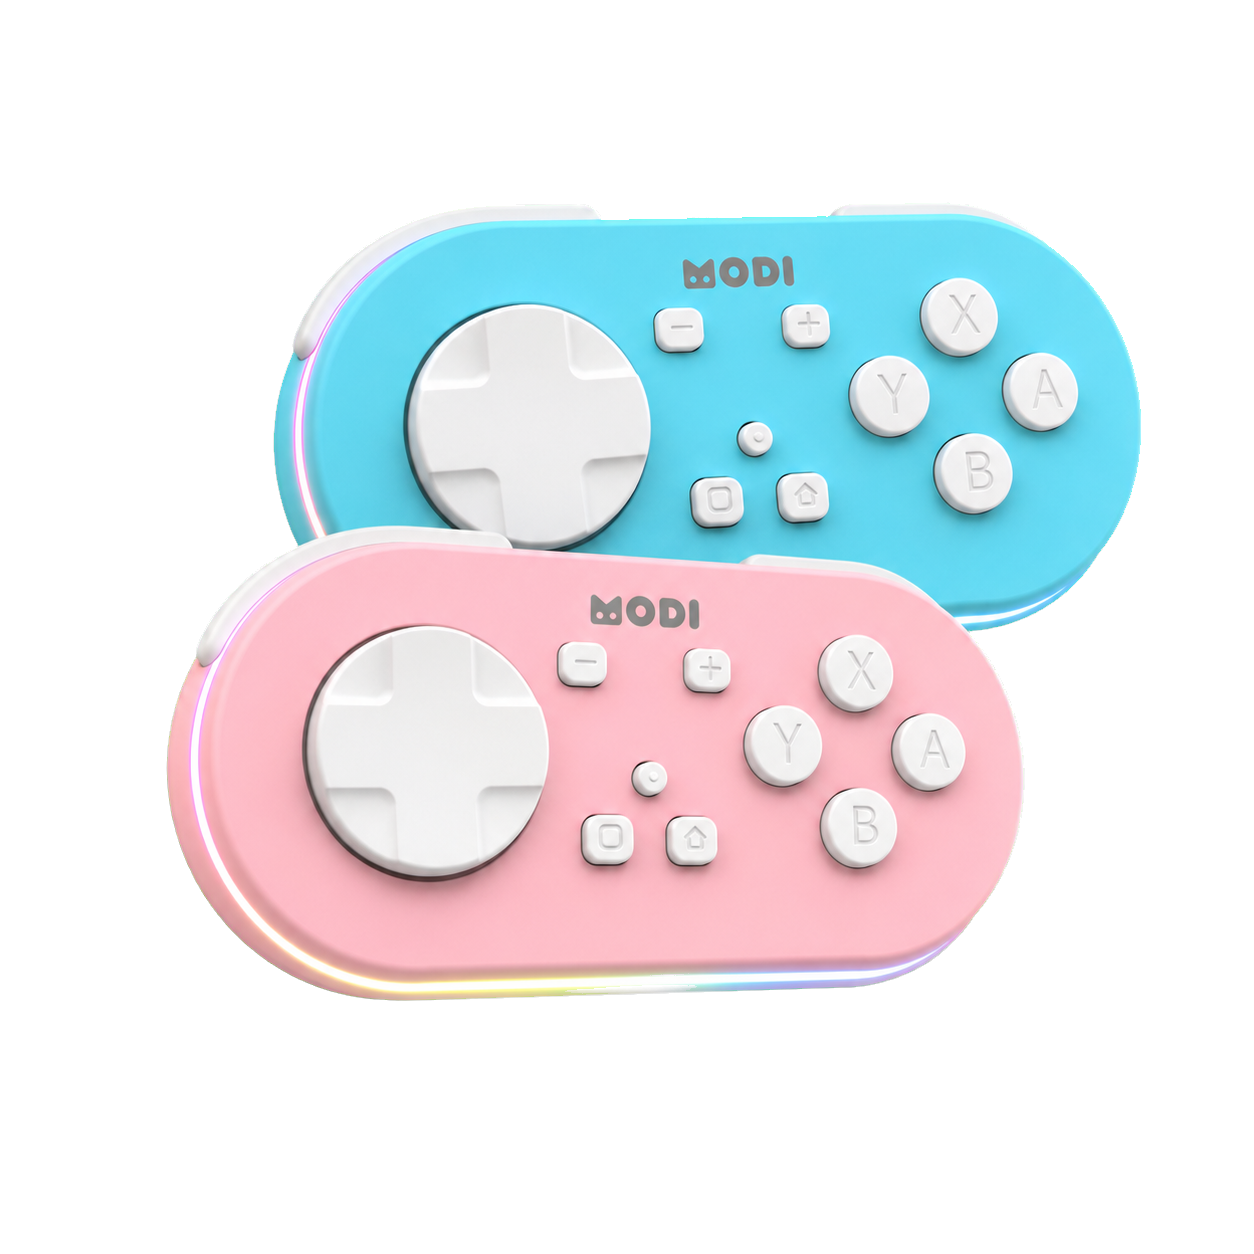
AnkiDroid may show MODI remote inputs with different X-Y-B-A button labels because of a known third-party display mapping issue. In the AnkiDroid key bind menu, the physical X, Y, B, and A buttons can appear as Y, X, A, and B instead. That label swap is visual only; it does not mean the remote is broken, unofficially changing modes, or unable to control assigned review actions.
AnkiDroid may show MODI remote inputs with different X-Y-B-A button labels because of a known third-party display mapping issue. In the AnkiDroid key bind menu, the physical X, Y, B, and A buttons can appear as Y, X, A, and B instead. That label swap is visual only; it does not mean the remote is broken, unofficially changing modes, or unable to control assigned review actions.
The practical fix is to configure by tested input, not by printed label alone. Press each physical MODI button while the AnkiDroid Set Key Binds screen is listening, then assign the action to the input AnkiDroid records. MODI is an independent Bluetooth accessory, not part of AnkiDroid or Anki, so the important distinction is simple: MODI sends the input, while AnkiDroid decides how that input is displayed in its menu.
Mismatch
The mismatch most often matters when you expect the four face buttons to appear in the same order printed on the remote. The source behavior to watch for is X-Y-B-A appearing as Y-X-A-B in AnkiDroid. In plain terms, a physical X press may be shown with the Y label, and the remaining labels may look similarly shifted. Treat those names as menu labels during setup, not as proof of the physical button identity.
This issue belongs to the way the input is presented in AnkiDroid’s configuration view, not to a separate MODI button layout for Android. MODI’s standard Android workflow uses Switch Mode because that mode exposes gamepad-style inputs for mobile apps. Once AnkiDroid records an input and connects it to an action, the action can still work normally even if the temporary label shown during binding looks different from the printed face button.
Visual
Calling it a visual issue is important because it changes the troubleshooting path. If the command fires after assignment, there is no need to keep re-pairing solely to make the displayed letter match the plastic button. The visible name in the menu can be confusing, but it is not the same thing as a failed Bluetooth connection, a low battery signal, or an unsupported AnkiDroid command. Judge the result by the action that happens during review.
A true functional problem looks different. If AnkiDroid does not record any input, if the remote is not connected, or if the assigned command never works in review, then label mismatch is no longer the whole explanation. Start by checking the Bluetooth connection state and confirming the remote is in the intended mobile setup mode. For the broader setup path, use complete MODI setup tutorial, then return to AnkiDroid’s bind screen and test each button again.
Test
A simple mapping test prevents most confusion. Open AnkiDroid, go to Settings, then Controls, then Set Key Binds. Choose the action you want to configure and press one physical MODI button. Write down the printed button you pressed and the label AnkiDroid displayed, then save or assign the action if it is the intended command. Repeat this process for X, Y, B, and A before relying on the menu’s displayed letters for future edits.
Use the same method for review actions you actually use, rather than trying to force a theoretical layout first. For example, decide which physical button should handle Again, Hard, Good, Easy, replay audio, undo, or another available AnkiDroid action, then bind that physical press to the chosen command. The final map should be based on what happens when you press the remote during study, because a working tested input matters more than the letter shown while assigning it.
Mode
For the standard MODI mobile setup on Android, use Switch Mode. That is the mode intended to expose gamepad-style inputs for AnkiDroid, while Keyboard Mode is mainly the desktop workflow with preset keybindings. If you previously paired in a different mode, Android may remember an older MODI entry. When changing modes or moving between devices, the recommended starting point is to forget saved MODI or Anki remote entries in Bluetooth settings and pair again cleanly.
After a clean pairing, press Home to wake and reconnect in the last-used mode. A successful Switch Mode connection shows the center LED as solid blue. If the remote connects but stays unresponsive after fresh pairing, restart the Android device and try again. That step matters because phone or tablet Bluetooth state can affect input delivery, and not every setup problem should be attributed to the remote or to AnkiDroid’s visual label mismatch.
Assign
When assigning buttons, avoid naming your layout only by the letters shown in AnkiDroid. Instead, describe it in physical terms: top button, lower button, left face button, right face button, or whichever orientation you consistently use. MODI is generally recommended in a vertical orientation with the D-pad facing down, so physical placement can be easier to remember than a letter that may be displayed differently in the Android bind menu.
If you later revise the layout, retest from the physical remote again. Do not assume that a copied note saying “X means replay” will match the label currently visible on screen. The safer note is “physical X button triggers replay,” or whatever command you confirmed. This keeps the setup understandable for anyone using the same remote and avoids chasing a cosmetic label difference when the underlying AnkiDroid action is already mapped correctly.
Limits
There are also limits to what this mismatch explains. It does not define every Android controller behavior, and it does not guarantee that every app will accept the same input. MODI’s Android guidance here is specific to AnkiDroid’s control binding workflow. Other apps may treat keyboard, gamepad, and shortcut inputs differently, so the right diagnostic question is always whether the target app recognizes the current MODI mode and lets you assign the command you need.
The useful takeaway is to separate three layers: the printed MODI button, the label AnkiDroid displays, and the action AnkiDroid performs. If those layers do not share the same letter, but the desired command works after testing, the setup is valid. If the command does not work, move back through the basics: confirm Switch Mode, remove stale pairings when changing modes, reconnect, restart the Android device if needed, and then repeat the mapping test.
Sources and product references
This first-party MODI guide was checked against the current product manual and relevant app documentation. App menus and third-party behavior can change after publication.